The Floor-Ceiling Model of Skill Acquisition

Is your music practice building true fluency, or is it just training muscle memory?

When we think about how to get better at a musical instrument — or any skill-based activity — the natural strategy that comes to mind is repetition. Repeat, repeat, repeat, until you’ve finally mastered it.

This is the tried-and-true method, and is absolutely correct. As a matter of fact, that’s the whole definition of practice — “performing an activity repeatedly or regularly in order to improve or maintain one’s proficiency.”

But we need to be careful with how we approach our practice sessions. If you spend all of your time practicing specific pieces, you will eventually master those songs but you won’t necessarily have gotten better at playing music in general. Effectively, all you’ve done is train yourself to regurgitate an exact sequence of notes, without any variation. An impressive feat, to be sure, but it hasn’t increased your musical fluency at all.

Learning a musical instrument of course requires maintenance and repetition, but we have to be careful that we don’t practice old things so much that we forget to work on new things. If you only ever practice the same things, you never really grow or improve. It would be like attempting to become fluent in English by memorizing a Shakespeare monologue, and nothing else.

Learn piano for free with MuseFlow. Click here to start your 7-day free trial. Find your flow through sight reading.t

Practice vs. Learning

Brad Harrison, a composer and educator who runs an excellent music education YouTube channel, insightfully describes the difference between practice and learning. Practice is trying to get better at things you already basically know how to do. By contrast, learning is the acquisition of new knowledge or skills, and the process of becoming familiar with new material. For example, playing through a piece of music for the first time would fall under “learning,” but each repetition after that would fall under “practice.” Both steps are important, but they are focused on very different goals. Regardless of where you are in your music learning journey, it’s essential that you maintain a healthy balance between practice time and learning time.

By making a habit of learning new things, you’ll develop the meta-skill of learning how to learn. This will make you a better musician and will even help you play old repertoire better. You’ll realize that every new challenge is just a puzzle to be unlocked and understood, and you’ll have the confidence to tackle that puzzle.

If you only play the same songs over and over again, you won’t grow or improve. You’ll either get bored and quit, or you’ll get stuck when confronted with a new challenge because you only know how to do what you already know how to do. Even when you do finally master a new song, the satisfaction of learning it will eventually fade away and you’ll feel stuck again. True musical fluency is the ability to quickly learn and master whatever you want, without needing to practice it for weeks or months on end.

The Floor and Ceiling of Competency

This brings me to an idea that I’ve been formulating over the past several years of working with music students. I think that the way we normally think about the concept of one’s skill level in a certain field needs to be expanded.

Imagine that a person’s skill level can be visualized as a vertical range, with a floor and a ceiling. The ceiling represents the level of music that a person could play well, given an indefinite (but not infinite) amount of time to practice. This could be represented by the hardest piece you’ve ever performed at a recital or competition, for example.

Alternatively, the floor represents the level of music a person could play well (not necessarily perfect, but certainly passable) on the first time they ever see it. This activity is what we call sight reading — reading on sight without any prior preparation. This could be represented by the average piece that you could find sheet music for and play today, without much practice.

Repertoire ranging from easy to hard, and some considered too difficult.
An example of where different songs may fall in a person’s floor-ceiling range.

Any piece of music that’s below the floor of your skill level is well within your ability to play without any practice. Any piece of music that falls somewhere between your floor and your ceiling can be reasonably mastered through dedicated practice — the closer it is to your ceiling, the longer it will take. The amount of time it would take to learn a piece in this range roughly equates to the amount of time it would take to work your way from the floor up to the difficulty level of the piece in question.

Most people spend the majority of their practice time endeavoring to raise their ceiling, tackling ever harder and harder songs that take them weeks, months, or even years to learn properly. This seems like a fine endeavor, at first glance. Ideally, by raising the ceiling of one’s ability, the floor would also rise by the same amount.

The same repertoire on the difficulty spectrum, now with increased floor and ceiling levels.
Floor and ceiling both moving upwards at the same rate. “Minuet in G” is now within your wheelhouse, while “Fantaisie-Impromptu” is now within reach after months of practice.

Unfortunately, this isn’t what actually happens. A person’s “floor level” is much more difficult to raise than their “ceiling level”, and it doesn’t happen automatically just by practicing more ceiling-level material. As a result, most music students don’t spend nearly enough time working on raising their floor.

The result is that a person’s ceiling moves up at a much faster rate than their floor, creating a wider and wider gap between them. This means that as they start working on more challenging material, each new song they attempt to learn will take longer and longer to master. This happens to everyone — it’s perfectly natural!

A person's ceiling level and floor level increases over time as they improve. The ceiling level trend line rises more rapidly than the floor level trend line.
Over time, the gap gets wider and wider. If you continue working on repertoire pieces at the top of your range, you will find that you start getting stuck for longer and longer.

Pretty soon, practice sessions have transformed from a fun learning opportunity into a constant source of frustration and stress that takes up all of their time. Students very quickly find themselves too far outside their comfort zone, without the necessary skills to learn increasingly advanced material in a natural, stress-free way.

This is because a musician’s floor level is actually a far more accurate barometer of overall musical competency than mastery of a song that has been meticulously practiced over and over again for months. In other words, a person’s floor level represents their degree of true musical fluency.

A musician's ceiling level is achieved through boring, repetitive practice, while their floor level is what someone can play via sight reading without preparation.
If you were in a foreign country and didn’t speak the language, would you rather be confined to a small selection of phrases from a guidebook, or be able to adapt to any spontaneous conversation that arises?

Music lessons often focus on the ceiling of someone’s playing ability, but all professional standards for working musicians place much greater emphasis on a minimum floor threshold of musicianship. It doesn’t matter how good you are after weeks or months of practice — it matters how good you are right now, at a moment’s notice.

So it’s important that you take some time to work on pushing your floor up, even though it might seem like the musical material you’re practicing is dropping way down in complexity as a result. It doesn’t mean you’ve gotten worse, it just means that you’re focusing on a part of your musicianship that you don’t normally focus on!

Starting your 7-day free trial is easy. Just click here to access the sign-in page, create your account, and begin for free.

Achieving Musical Fluency

So how does one actually raise the floor of their skill level then? Here are some specific areas of focus that are most helpful in improving overall musical fluency.

  1. Sight Reading
    Sight reading is the cornerstone of elevating your floor. It’s the ability to play a piece of music on the first try, without prior practice. Dedicate time regularly to sight read different pieces, varying in styles and difficulty. This sharpens your adaptability, reinforcing the fundamental skill of playing music fluently from the very first encounter.
  2. Technique Exercises
    Technique exercises might not be as glamorous as performing a complex piece, but they are the building blocks of musical proficiency. Focus on scales, arpeggios, and finger exercises. These not only enhance your technical skills but also contribute significantly to your floor level. A strong technical foundation ensures that you can handle a broader range of musical challenges.
  3. Music Theory
    Music theory is often neglected, but it serves as a compass in your musical journey. Understand the relationships between notes, chords, and progressions. It provides a roadmap, allowing you to navigate unfamiliar musical territories effortlessly. The more intimately you understand the language of music, the more confident and fluent you become.
  4. Ear Training
    Cultivate your ability to listen critically and reproduce what you hear. Ear training is fundamental to musical fluency as it enhances your capacity to recognize tones, intervals, and harmonies. Start with simple exercises like identifying intervals and progress to more complex tasks. This skill not only raises your floor level but also opens doors to improvisation and playing by ear.
  5. Diversity of Repertoire
    Instead of getting stuck in the loop of practicing the same songs repeatedly, diversify your repertoire. Explore different genres, time periods, and difficulty levels. The more varied your musical vocabulary, the more adaptable you become. This approach aligns with the idea that every new challenge is a puzzle to unlock and understand.

These five areas are what I call the fundamental “food groups” of musicianship. I’ll be going into more depth about each of these in future posts.

Building a well-rounded practice routine is important, and methods with which to do so are well-documented. That being said, it is much harder to be intentional about raising one’s floor level than you might expect.

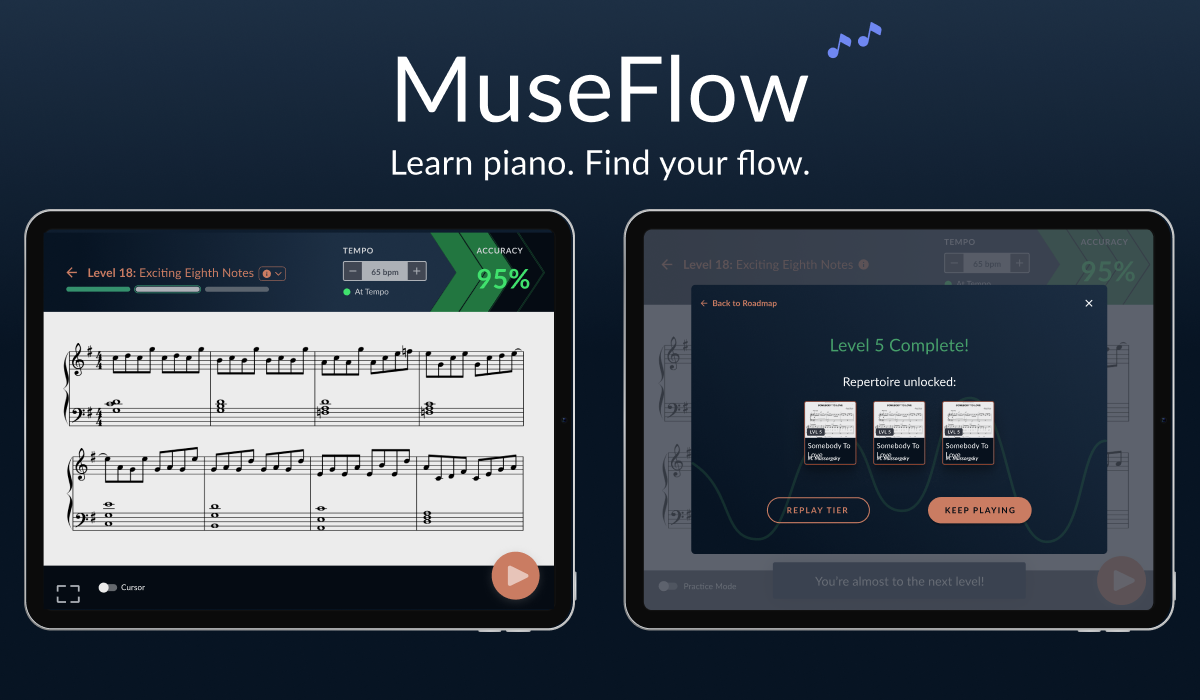
MuseFlow: Raising the Floor

At MuseFlow, we’re building solutions to this very problem. The app guides users through a continuous sequence of sight reading exercises, increasing complexity by one skill at a time. By constantly playing new material that they’ve never seen before, MuseFlow users have a unique opportunity to hone their ability to read and play music fluently.

In this way, our curriculum ensures a balanced approach between practice and learning. It guides you through a variety of musical challenges, preventing you from getting stuck repeating the same pieces over and over again. This diversity cultivates a well-rounded skill set, and raises the overall floor of your musical ability.

While our main focus is currently on sight reading training, we have lots of exciting new features coming later this year, including technique, music theory, and ear training exercises, as well as a repertoire library and practice assistant. Stay tuned for more updates about all that and more, coming soon!

If you’re looking for a practice tool to help you improve your musical skills, and haven’t been able to find a system that truly delivers the results you’re looking for, consider trying out MuseFlow. Just head on over to https://museflow.ai to sign up for our web app and start your 2-week free trial today.

It’s time to break free from the frustrations of repetitive practice and finally achieve the level of musical fluency you’ve been striving for. Happy playing!

Related Posts
How to Play a MIDI Keyboard

A MIDI keyboard is very much like a piano or digital keyboard - they both have the same keyboard layout, and they can both play that classic “piano” sound. However, a MIDI keyboard can do much more than just let you play the piano! In this article, we’ll discuss the benefits of MIDI keyboards and different use cases for playing them - DJs and music producers, composers, and finally music students.

Introduction

MIDI stands for Musical Instrument Digital Interface. It is the instrument that translates a musical keystroke into 0s and 1s so a computer can interpret your actions. MIDI keyboards, or MIDI-compatible keyboards, are used by DJs and music producers as their main sound producting instrument. You can load many different sounds onto it - a grand piano, a synthesizer, strings, whatever you’d like - hook it up to your computer, and play those sounds as part of a larger whole.

MIDI Keyboard for Producers and DJ’s

Producers and DJs write their music in any number of DAWs out there - Digital Audio Workstations.

Typically, they use a MIDI keyboard to quickly play out different parts of a musical arrangement.

A MIDI keyboard at a work station for DJ's and music producers.

Use Case for Composing an Indie/Pop Tune in Logic Pro X

Instrumentation:

  • Drums
  • Electric Bass
  • Piano Synth
  • Lead Guitar
  • Horns
  1. Set the Tempo:
    • Set the tempo (speed of the song) in your DAW (Logic Pro X) for how fast you want it to be.
  2. Record the Electric Bass:
    • You look through a bunch of electric bass sounds and find that you really like the Liverpool Bass sound, so you upload that to your DAW.
    • Start recording and play the MIDI keyboard in that sound to the tempo you’ve set.
    • Experiment by recording several takes until you find a groove you really like.
  3. Lay Down the Drums:
    • Choose a drum kit SFX that you like and that maps well to your MIDI keyboard.
    • Record the drum part by playing the keys on your MIDI keyboard associated with the drums or cymbals you want to include.
    • This will take some experimentation so be patient! Enjoy the cacophony that comes with this percussion instrument. you’ll soon find a pattern you love.
  4. Record the Piano Synth:
    • Browse through the synth sounds in Logic and try out a few until you find one that fits the vibe of your song.
    • Record some simple synth chords. Keep it understated… the goal is to fill out the sound without drawing too much attention.
  5. Record the Lead Guitar and Horns:
    • Find samples of a lead guitar and horns that you really like.
    • Load them into your DAW… they’ll map to your keyboard.
    • Play and record these parts in time with the rest of the instruments to complete the arrangement!

If you want to add vocals to this piece, write lyrics and come up with a melody. Consider different structures for your song. Repetition is key here. We as humans like to hear things a few times so we can really understand it.

MIDI Keyboards for Composers

If you’re looking to compose something that someone else will need to play, you’ll need to write it down on sheet music. The process is very similar to what DJs and producers do, but instead of a DAW, composers usually write their music in music notation software. They use a MIDI keyboard as their main instrument.

A MIDI keyboard next to music notation software for composers.s

Use Case for Composing a Classical Piece in Sibelius

Instrumentation:

  • Strings (Violin, Viola, Cello)
  • Flute
  • Clarinet
  • French Horn
  • Timpani
  1. Set the Tempo and Time Signature:
    • Open your music notation software (Sibelius) and set the tempo and time signature for your piece.
  2. Compose the String Section:
    • Start with the strings (Violin, Viola, Cello).
    • Choose a rich, warm string sound. Begin by notating the main harmonic structure with the Cello. Make sure there’s a solid bass line in there.
    • Add the Violin melody, keeping it simple and lyrical. Then, fill in the Viola with harmony.
    • All of these instruments will be on separate staves, so you’ll want to choose the orchestration template so you have all these instruments on one sheet of music.
  3. Experiment and Refine:
    • Play back the string section to ensure it flows well. Make adjustments to the harmonies so it sounds good, then add dynamics, articulations, and phrasing to make it musical!
  4. Add Woodwinds (Flute & Clarinet):
    • Add a Flute line… possibly doubling the Violin melody or adding a counter-melody.
    • Introduce the Clarinet with supportive harmony or another counter-melody. Keep it light to complement the strings.
    • Copy the dynamics you have for the strings. Make sure it all lines up nicely.
  5. Incorporate the French Horn:
    • Notate the French Horn part. This adds warmth and depth to the harmony. The French Horn can also provide rhythmic support or reinforce the bass line with the Cello.
    • Consider articulation here - A percussive articulation could be fun for rhythm, or a smooth, flowing articulation could be nice for a more lyrical interpretation.
  6. Compose the Percussion (Timpani):
    • Add the Timpani to provide rhythmic structure and emphasize key moments. Keep it subtle; the Timpani is there to support, not dominate. Unless you want it to dominate :).
  7. Playback and Adjust:
    • Listen to the piece with all the instruments together. Fine-tune the dynamics, articulation… balance between the sections to ensure each instrument's role is clear.
  8. Finalize the Score:
    • Review the entire score, ensuring all notation is correct. Play along with it on your MIDI keyboard so you can be sure it’s exactly the way you want it to sound. Double-check that all dynamics and expression markings are consistent throughout the piece.
  9. Export and Share:
    • Export the score as a PDF and, if needed, as MIDI or audio files. Share the sheet music with performers or collaborators!

MIDI Keyboards for Piano Students

Whether you’re a beginner or expert, there are piano learning software options out there for everyone. You can use your MIDI keyboard to learn piano. Let’s map the same process above to setting up your keyboard and computer and using one of the best piano learning software out there, MuseFlow.

A MIDI keyboard is being played and is connected to MuseFlow to learn piano.

Use Case for Learning Piano with MuseFlow

Equipment:

  • Computer (laptop or desktop)
  • MIDI Keyboard
  • USB/MIDI Cable (compatible for both your keyboard and computer)
  • Chrome or Edge Browser
  1. Set Up Your Equipment:
    • Turn your computer is on.
    • Connect your MIDI keyboard to the computer using your USB/MIDI cable.
    • Make sure the cable is compatible with your keyboard and computer.
  2. Open MuseFlow in Chrome or Edge:
  3. Make Sure Your MIDI Keyboard is Connected:
    • Go through the welcome flow and get to the roadmap.
    • Try to play a few notes and make sure they come out of your speakers.
    • If not, go to the settings and ensure that “device speakers” is toggled on.
  4. Choose a Level Where Your Skill Matches the Challenge:
    • Find the level that fits your skill level.
    • Look at the preview images of the music in the levels and see what you can play.
  5. Try a Few Levels:
    • Go through the tutorial, and play along with the music.
    • Start the level, and play through a few bars. If it’s too easy for you, try another level.
    • NOTE: The first tier of each level is easier than the later ones, so you may want to play the full level to see if it’s a good place to start for you.
  6. Continue From There:
    • Once you’ve found the level that’s right for your skills, go ahead and pass that level, then move on to the next!
    • The tiers/levels should be fairly easy to start, then get harder as you go along.
Learn piano with your MIDI keyboard with MuseFlow.

Conclusion

Whether you’re a producer, DJ, composer, or music student, MIDI keyboards are the perfect instrument for you to play. See the above step-by-step guides to see how you can use your keyboard in each scenario. Keep rocking it, and we’ll see you on the next one!

Curious about whether MuseFlow is right for you? With a MIDI keyboard and a computer, you can try it out at beta.museflow.ai. We can’t wait to hear your feedback as we make music education available and engaging for everyone!

The Best Way to Learn to Play a MIDI Keyboard: Discover Why MuseFlow is the Best Choice

Do you have a MIDI compatible keyboard at home or in a studio and you want to learn to play the piano with it? MuseFlow has your back, and answers this question with a big “come on in everyone! Every type of keyboard is welcome!” Let’s first discuss the differences and similarities between a MIDI keyboard and a piano. Then we’ll dive into what MuseFlow is and why it’s the best platform for you to learn how to play your MIDI keyboard.

Interested in MuseFlow? Try it for free for 7 days!

What Is a MIDI Keyboard?

We’ll keep this short. A MIDI keyboard is a keyboard that sends musical information through its digital interface to your computer or laptop (See MIDI - Musical Instrument Digital Interface. Music can be broken down into rhythm, pitch, velocity, volume, sustain, and a bunch of other information categories. When you play a note, the information associated with that note and how you played it gets converted into ones and zeroes and is sent to your computer or laptop via your MIDI device. It’s the most reliable way to make sure the information of what you’re playing gets to your laptop or computer exactly the way you played it.

Usually a MIDI keyboard is hooked up to your computer via a USB cable or through Bluetooth. See MuseFlow’s FAQ “Where can I buy a ‘plug and play’ MIDI keyboard and cable, and which one is right for me?” for more information on MIDI keyboards and the cables we recommend.

A 25 key MIDI keyboard.
This is a 25 key MIDI keyboard. It’s usually used by composers and producers since it’s portable and versatile!

A piano, on the other hand, is an acoustic instrument that doesn’t require electricity to play. It has hammers attached to the keys on a keyboard, which hit strings of certain lengths that ring out to create sounds at certain pitches. When you press down on a key, those strings for that pitch ring out. The vibration of those strings create the sound waves you hear!

The keyboard on a piano is laid out the same as a MIDI keyboard, and the pitches are the same. It’s just that a MIDI keyboard is a digital version of a piano, and relies on electricity to run. A piano is an analog version of the MIDI keyboard, which is solely a digital instrument.

Start your 7-day free trial to learn to play a MIDI keyboard

Why MuseFlow is the Best for learning MIDI keyboards

MuseFlow is a piano education application that teaches you how to play the MIDI keyboard through sight reading (the act of reading music at first sight).

The level page of MuseFlow showing red, yellow, and green notes.
Every note you play in MuseFlow turns red, yellow, or green depending on how you played it. Red for a complete miss, yellow for a duration error (you held it too long or too short), and green for perfect!

For the best connection possible, you’ll want a MIDI keyboard connected to your laptop or tablet. That is the most reliable form of connecting any MIDI keyboard to MuseFlow. It will know if you held the note long enough, played the note correctly, or missed it all together. It can even tell if you grazed a wrong note just slightly!

With the precision offered by MIDI keyboards and MuseFlow's ability to connect to them, it stands as the #1 piano learning app for this reason alone! Not to mention the fun you’ll have with its gamified approach to learning music. Each level is a new skill you need to learn (a new note, or new rhythm). And once you play four phrases of music in a row at or above 95% accuracy, you are moved onto the next level.

The level complete screen of MuseFlow with congratulations on it.
Congratulations! You have successfully mastered that new skill!

Conclusion

If your goal is to learn how to play the MIDI keyboard, MuseFlow is the best piano learning app out there to get you to where you want to be. With the level of accuracy and accountability a MIDI keyboard offers you in your learning journey, it is the #1 tool you can use to better yourself and improve your piano skills with MuseFlow.

Try MuseFlow today! Sign up for your 7-day free trial and learn how to play your MIDI keyboard with ease.

Try MuseFlow for Free!

subscribe to our MAILING LIST

Keep up to date on our progress as we continue to add new features!

Thank you! Your submission has been received!
Oops! Something went wrong while submitting the form.